11.2.
LET-OFF ADJUSTMENT
| The
information presented here is for educational purposes only. Please consult
a professional gunsmith before and after conducting any work on a firearm......
In other words be smart about it, and use this info intelligently.
|
11.2.1. General
 Only
the armorer trained on the assault rifle is authorized to undertake let-off
adjustments.
Only
the armorer trained on the assault rifle is authorized to undertake let-off
adjustments.
The let-off is correctly adjusted if the let-off
cam of the sear lies upon the let-off spring arm and the sear notch is still
only slightly engaged with the hammer notch.
During
let-off adjustment, the hammer may not strike against the trigger housing.
The let-off is to be adjusted so that it is clearly
felt with the winter trigger.
 |
 |
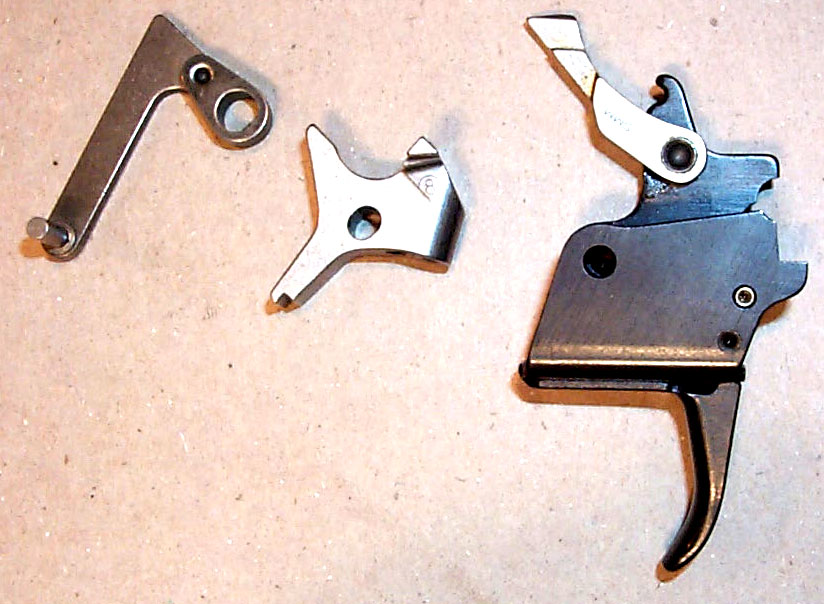
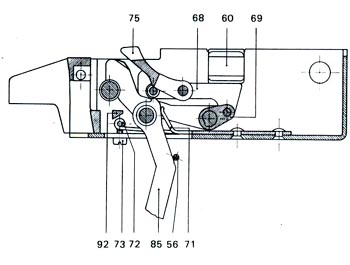
Seriefeuersperre,
Winterabzug und Druckpunktvorriclitung
56 Anschlagstift
60 Seriefeuersperre
68 Winkelhebel mit
Stift
69 Zwischenhebel
71 Federarm fOr Winterabzug
72 Druckpunktfederarrn
73 Druckpunktreguliermutter
75 Seriefeuerklinke
85 Winterabzug
92 Druckpunktnocken
der Abzugstange
|
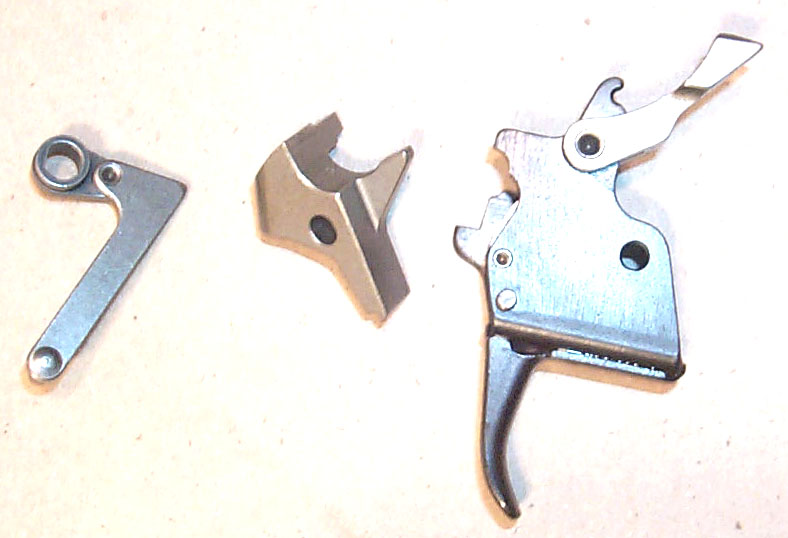
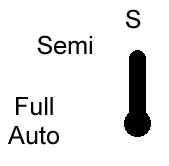
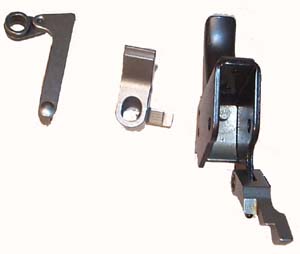
(Above
Left) Trigger group, shown for clarity without sear and trigger. Part
#60 is the white tab that signifies a semi-auto rifle. (Above) Diagram
depicts actual safety positions. |
11.2.2.
Carrying Out the Adjustment
Sequence of Tasks!
1) Unload weapon!
2) Let-off inspection by the armorer
3) Remove trigger mechanism from the weapon
4) Inspection of trigger components (in detail, if necessary)
5) Mount clamping lever for let-off adjustment and clamp until the let-off
adjustment nut protrudes from the hole in the trigger housing
6) With special socket wrench, turn the let-off adjustment nut as appropriate
7) Insert trigger mechanism (hammer cocked)
8) Re-inspect let-off on the assembled weapon
9) Carry out functional inspection accord 4
ng to paragraph 10.1.2.
Note:
|
Trouble
|
Remedy
|
|
Let-off
drags, or the hammer cannot be released:
|
Tighten
let-off adjustment nut
|
|
Let-off
too weak or not present:
|
Loosen
let-off adjustment nut
|
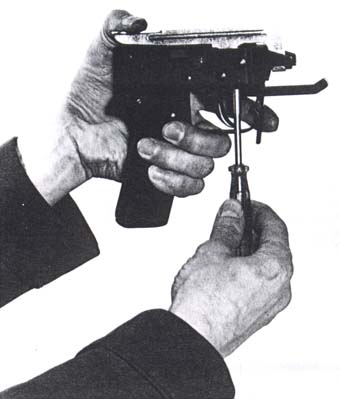
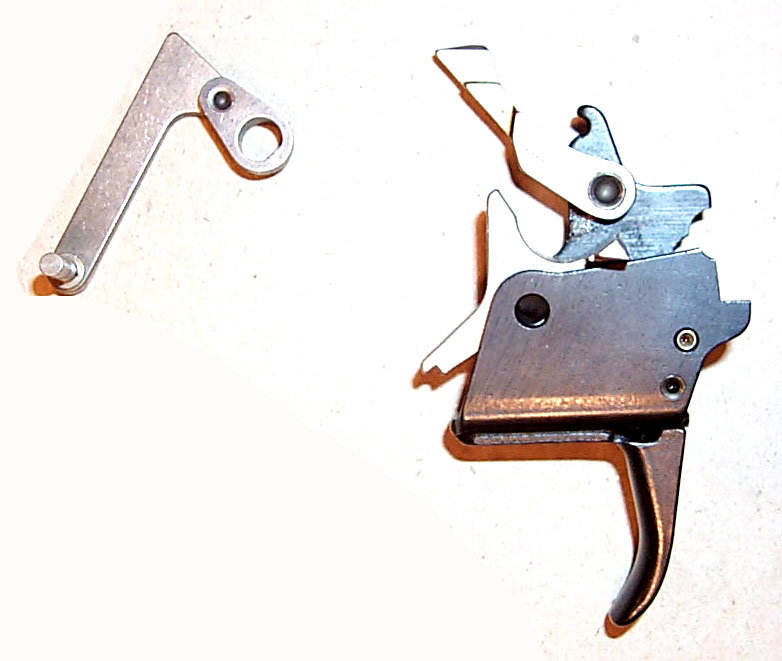
Figure 86
Adjusting
the let-off
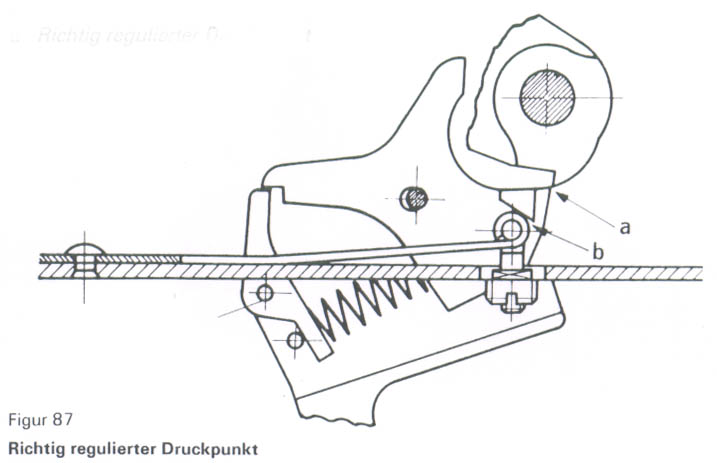
A.
Correctly adjusted let-off
Figure
87
Correctly adjusted let-off

The let-off cam of the sear (b) presses against
the let-off spring arm. The sear and hammer notches (a) are still only slightly
engaged.
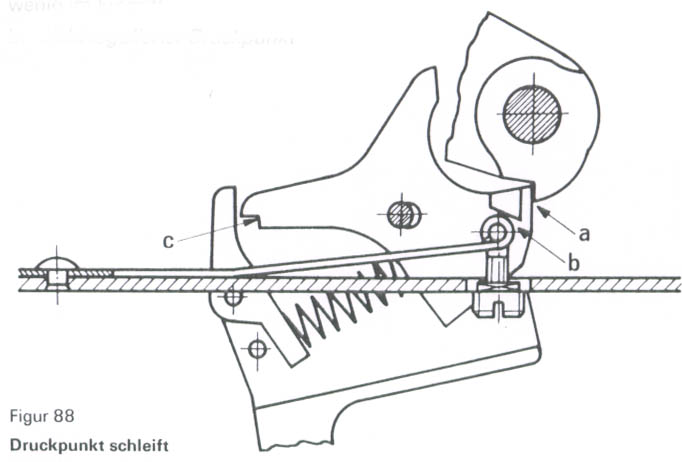
B. Unadjusted let-off
Figure
88
Let-off drags
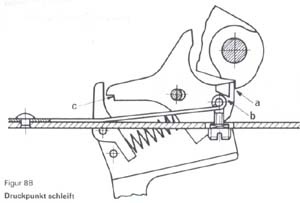
The let-off cam of the sear (b) presses against
the let-off spring arm. The sear and hammer notches (a) are too strongly engaged.
If the let-off adjustment nut is loosened all
the way, the release pawl can no longer engage the sear (c).
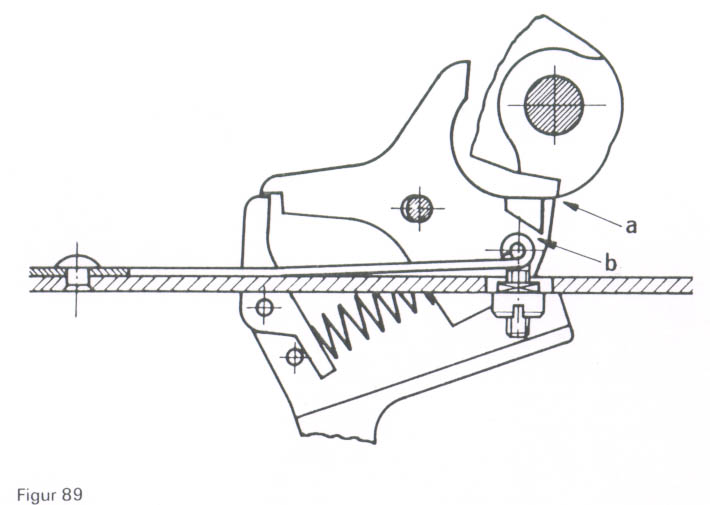
Figure 89
Let-off too weak (or no let-off present)
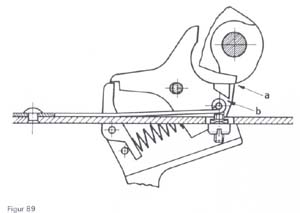
The let-off cam of the sear presses against
the let-off spring arm. The sear and hammer notches, however, are too slightly
engaged (the let-off is too weak).
If the let-off adjustment nut is tightened
all the way, the letoff cam of the sear does not reach the let-off spring
arm (b). The sear notch releases the hammer (a) (no let-off is present).


Last Modified on
March 17, 1999
aalbert@biggerhammer.net
 Only
the armorer trained on the assault rifle is authorized to undertake let-off
adjustments.
Only
the armorer trained on the assault rifle is authorized to undertake let-off
adjustments.